Showing posts with label EAD Designs. Show all posts

Thursday, March 22, 2012

DIY Thursday: Monogrammed Pail

Its DIY Thursday!
Today's project shows how I used EAD Designs Vinyl to turn a simple white pail into a beautiful spring decoration! I am IN LOVE with the way it turned out!  Head on over to EAD Designs to see how I did it!

Thursday, March 15, 2012

DIY Thursday: Lucky Mirror

Its DIY Thursday!
Today's project shows how I used EAD Designs Vinyl to create a fun St. Patty's day decoration! I may just keep it further into the Spring!  Head on over to EAD Designs to see how I did it!

Thursday, March 1, 2012

DIY Thursday: Pet Food Canister

Its DIY Thursday!
Today's project shows how I used EAD Designs Vinyl to create a cute alternative to kitty chow bags taking up visual space in our kitchen! It is such an easy project and literally takes about 3 minutes! Head on over to EAD Designs to see how I did it!

Thursday, February 16, 2012

DIY Thursday: Days Until Countdown

Its DIY Thursday!
Today's project is a little motivator to get through the winter blues. It is super easy and super cheap!   Head on over to EAD Designs to see how I did it!

Thursday, February 9, 2012

DIY Thursday: Mixer Love

Its DIY Thursday!
Today's project is a fun way to spice up the kitchen! I love our KitchenAid mixer. Head on over to EAD Designs to see how I used vinyl to add some pizzaz!


Thursday, February 2, 2012

DIY Thursday: Wrought Iron Artwork

Its DIY Thursday!
Today's project shows another easy way to use vinyl to spruce up an akward space. Head on over to EAD Designs to see how!


Thursday, January 19, 2012

DIY Thursday: Established Sign Wall Art!

Its DIY Thursday!
Today's project is so simple and only takes about 5 minutes! It is an easy pick-me-up to a plain wall or entryway! Head on over to EAD Designs to see how!

Thursday, January 5, 2012

DIY Thursday: Personalized Calendar

Its DIY Thursday!
Today's project is totally versatile and is all about organization! I love listing, so this was right up my alley! It was another gift for the little sister, but I totally want to make one for our house too! Head on over to EAD Designs to see the cute dry erase calendar that I made! Mom, she has no excuse for missed homework now!

Thursday, December 29, 2011

DIY Thursday: Blinged out Chadelier Wall Art

Its DIY Thursday! I must admit, I LOVE the project that I shared today!
Head on over to EAD Designs to see the chandelier wall art that I made for my little sister's bedroom makeover! We decided to do that for her for Christmas, and I think that this super cute chandy will really spruce up her room!

Thursday, December 22, 2011

DIY Thursday: Quatrefoil Ornament

Its DIY Thursday! Today, I shared a really cute Christmas craft. This is such a fun project!
Head on over to EAD Designs to see how I took a simple glass ornament, some vinyl and rhinestones to create a cute little ornament to give as a gift!


Thursday, December 15, 2011

DIY Thursday: Framed Wall Art

Its DIY Thursday! One of my favorite days of the week! Today, I went a little vintage and shared a project that I did a while back. It is one of my favorite projects that I have done to our home to date, and it was too good not to share with all of my new DIY Thursday friends over at EAD!
Head on over to EAD Designs to see how I spruced up our master bedroom with a little vinyl and moulding!


Thursday, December 8, 2011

DIY Thursday: Quatrefoil Vase

Its DIY Thursday! I LOVE LOVE LOVE the project that I shared on there today!
Head on over to EAD Designs to see how I took a plain vase and made it amazing with a little vinyl!

Thursday, November 3, 2011

DIY Thursday: Chalk-it Cannisters

Hey guys! Its DIY Thursday over at EAD Designs!


You should head over and check it out! Click the picture below to see the post!

Happy Thursday!

Thursday, October 6, 2011

Fabulous Friday #6: Message Plate!

Welcome to the 6th Fabulous Friday! We had a great turnout last week! Tell your friends to link up this week!

Today I have a super easy, super cute, super functional tutorial for you guys! I don't know about you, but I am a lister. I forget things really easily, so I always try to write them down. Whether it be messages to my husband, or more often messages to myself, I leave lots of messages. So when I saw these cute little vinyl stickers at EAD Designs, I HAD to have them! (CLICK HERE to see them and get your own!) For those of you that are newer here, I made a gift for a friend using one of there HERE. When I ordered the first one, I actually ordered 5! I love them and they are such a cute/easy gift idea! But I had been reserving a couple for myself.

At TJ Maxx about 3 months ago, I got this cute little rectangle shaped plate on clearance for $1.99. I have been holding onto it for quite a while. The other week when I was cleaning out my girl room, I decided that I was going to use this plate for my message plate.
 The only issue was that the decal was a little bit big for the small plate. I loved the little swirl under it, but it just was too much for this smaller plate.
So I cut it off!
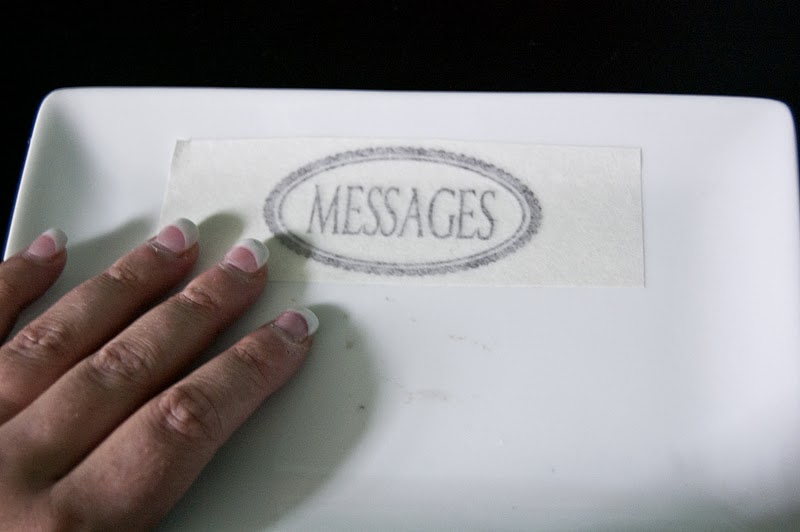
Next, you simply peel off the backing, leaving you with your vinyl on the transfer paper.
It will be a little sticky. Place it where you want it on the plate. I centered mine at the top.
If you order from EAD, they will send you a popsicle stick like this. But you really could use just about anything like this (penny, credit card, etc). You want to use this to rub on the vinyl until it looks lighter, this means it is pulling away from the transfer paper and sticking to the surface, much like a temporary tattoo.
Once you are sure that it is stuck on there (you can check a small corner if you are not sure), carefully peel the transfer paper off of the plate (or wall, or whatever you are sticking the vinyl to).
It should look a little somethin like this! I think it is soooo cute! Now I just need a cute dry-erase pen to write on it with!
Okay, friends! Let's see what you've got! Please don't forget to grab my button so that your friends can join too!