Sunday, January 8, 2012

A Year in Review

I know...you are probably thinking, this girl missed the boat on the old year wrap up, new year kick off thing. I mean we are a week into 2012! However, bare with me. I am not recapping and kicking off a new calendar year, but celebrating one year of blogging.

A year ago today, I wrote my first post on here! (Click here to read it) Only a few things have changed since that first post. I am still married and my hubby is still wonderful. And we still live in our first home. And we still love it. I still love to create and craft. I am now 23 and my job title has changed to Quality Assurance Manager. I also now have the amazing blessing of working from my home (as of last week...I am LOVIN it, friends!). I also have nixed the whole...line of slings thing. But I DO have my own stationery and design business that I do on the side. I would love to set up an Etsy for it, just have never gotten around to it. Melissa at Lissalaneous Thoughts was my very first commenter. She will always have a special place in my little bloggy heart! :)

We were dealing with so many issues regarding our basement back then. There was some real drama there... Its so fun to read back to what a little wanna be blogger I was. I had not found my style yet, so I just posted about anything and everything. A little patience and perseverance and I have come into my own :) My very first DIY Project I shared was Repurposing Storage Space (okay and not sure why that whole first paragraph is in Caps....LOL)
I have gone from no followers to 280 (I love you all!) which I know is not huge, but to me that is awesome. My all-time pageview history is 104, 052 as of my writing this post. That number is humbling considering that my blog is such a baby. I cannot wait to see what this next year holds!

Thank you for reading this. And thank you for following my blog. My readers are what motivates me! Well...that and the fact that I really am addicted to decorating!

Friday, January 6, 2012

Fabulous Friday #16!

Its Fabulous Friday!

This is the first Fabulous Friday of 2012! I cannot believe I am coming up on my one-year anniversary with OhhBaby Designs. This past year has flown by! This year is all about new beginnings and growth for me. I can't wait to see what it holds! That being said, I can't wait to see what you guys link up! Any fun organization ideas? I know that usually this party is just for crafts, but if you have any new years resolution posts or goals, I would love to read them. I need a little motivation to do some of my own!

Please don't forget the button!


Thursday, January 5, 2012

DIY Thursday: Personalized Calendar

Its DIY Thursday!
Today's project is totally versatile and is all about organization! I love listing, so this was right up my alley! It was another gift for the little sister, but I totally want to make one for our house too! Head on over to EAD Designs to see the cute dry erase calendar that I made! Mom, she has no excuse for missed homework now!

Wednesday, January 4, 2012

Mirror Windows for the Fireplace

Here I am again with another living room project! This makes the room! In case you forgot, here is the room with the new paint color and the mantle. (Please excuse the night shots...the color is less than desirable!)
 I have been wanting to find a way to bring more light into the room and open up the space a bit. While scavenging on Pinterest, I became inspired to use mirrors:
 
Upon realizing how much I loved the look of the mirrors, I knew just what I wanted to do. I hopped on over to the dollar store, hoping to find some simple, frameless mirrors to create the look of the first photo. What I found, I ended up loving more! They have these cute little framed mirrors and they are, obviously, a dollar each! so for $8 I got these:
 To test them out o size and placement, I nailed each one up to the wall separately, starting with the top left and using a level to get them even.


 I then used a measuring tape to get the distance from the top of the mantle to start the other side. On this side I started with the bottom right, because it was the easiest to measure. You may notice the space between the top and bottom row is a bit off, but I fixed that later :)
 Now, when I dreamed up this little project, I envisioned white frames. So, I covered each mirror with paper and painted them with a brush. The hair dryer was a product of my impatience between coats. :) Would it have been far, far easier to pop the mirrors out and spray paint them? I am sure of it. But I was on a roll and decided to go this route using the same paint that we used for the door and mantle to make sure that it matched.
 After giving them adequate (just barely) time to dry, I used a razor to scrape any paint off of the mirror and then I popped those babies back on the wall, fixing the placement of the bottom two when I did.

They are absolutely perfect for what I had in mind! I love how they reflect the sunlight around the room! Because of the way that our house sits on the lot, the majority of the day, sun comes in through the back of the house in the kitchen. It is amazing to have mirrors placed exactly where they catch that sunlight and shine it into the living room.
 They are so cute and look like they came with the room! I love the way that the white pops off of the tan walls.
 We do have our winter mantle up, and it is fabulous! But that is another post for another day. For now, I will continue to marvel in this little $8 room pick-me-up.
Seriously, isn't it so fun to walk into a room in your house and feel like you can't help but stare??? I LOVE it! I think that this is by far a perfect solution for a windowless wall to bring some light in. I could not be more pleased!

Tuesday, January 3, 2012

Turning the Door White

With our new living room paint color, The unpainted, wooden door was really not sitting well with me. I have never loved it anyway, but the oak brown against the light coffee color hurt my eyes. I have always wanted to paint it white, so when my husband suggested it, I leaped at the chance!
 Here she is, after a couple of coats of white trim paint. It is amazing what a huge difference this made to the room. That corner always felt so dark to me, and now the white door just pops out and brightens the entire space!
And here is our cute little Ikea lantern that we got several years ago, just glowing next to it. I love how warm and inviting it is!
Today is my official first day working from home and let me tell you, I LOVE it! There is something so wonderful about being able to be in my own home while I am working. Everyone kept asking if I would get distracted being at home but honestly, I feel more focused. I can really buckle down and do work without being interrupted or getting off task. I am so happy with this change! :) More to come with the living room!

Monday, January 2, 2012

Painting the Living Room

Once I got the vinyl off (see my last post), we moved on to taping and painting. But before I show you that...let's take a look at what the living room was :)

I don't have too many recent pictures of the living room, so I will give you a Halloween throwback. Here is myself and my friend, Emily in front of our off-white walls, with our less than fabulous wall grouping behind us.
 And to give you another angle, here are our minions husbands. I know the lighting is weird, sorry! The days are shorter now!
 And here is a photo from the last post, showing you the mantle wall before the new paint.

 Here are the clean walls, with some of the taping done.
 Now once we started to paint the new color on the walls, we noticed that the top of the mantle was looking a little dirty. So we dug out our white trim paint to paint just the top. Well as you can see in the photo below, the paint that they used was wither a different shade or it was just that dingy from whatever they did with the fireplace that made our walls so funky.

 We ended up totally repainting the mantle. Honestly thought, I am glad that we did because it makes the mantle really pop off of the new tan walls!
 See how crisp and clean it looks? I love it!
Here is the wall color. The lighting is a little weird because I had to take these photos at night. The color is not as peachy as it looks in the pictures. I will try to get some day time pictures to add on here soon!
 I can't get over how much I love the mantle now! It really stands out!
 Here is one daylight photo that I took of the paint down the hallway. I was worried that the darker color would make the hallway feel smaller, but it really doesn't at all. The entire room is so cozy now!
I can't wait to show you all of the other updates that we have made to the room! It really does feel like a different space. Isn't it just such a good feeling when you walk into a room and feel compelled to pause and enjoy it? And you can't help but smile. That is my favorite. I want every room in our home to make me feel that way. Now it is ours. :)

Let's just compare before and after really quickly, shall we?


Sunday, January 1, 2012

Removing Vinyl

Happy New Year friends! For New Years, my sweet hubby and I spent the weekend on home-improvement, and let me tell you that I have a lot to share! As I mentioned earlier, for Christmas Michael bought me paint to paint our living room. Well this turned into the whole...if you give a mouse a cookie situation. Really more like if you give a girl a can of paint, she will have to remove the old vinyl from the wall. Once she removes the old vinyl, you will realize that while the paint is out might as well touch up the top of the mantle. If she touches up the top of the mantle, she will realize that the new white does not match the rest of the mantle. If she realized that the whites don't match, she will want to paint the whole darn thing. And while the white paint is out, why not paint the front door? And while are are re-doing the living room, why not just create some fun accessories?? You get the point. One thing lead to another lead to another. But it looks AMAZING!

First post on this fun little (or not so little) project is how easy peasy it is to remove vinyl from your walls. Typically, all you have to do is hold a hair dryer to the vinyl and then it will peel right off. This vinyl was on our walls when we bought the house, so I figured it would be on there really well and give me a hard time.
 Please note the off white walls with soot all over them. We tried so hard to get this off when we moved in but they always looked a bit dingy.
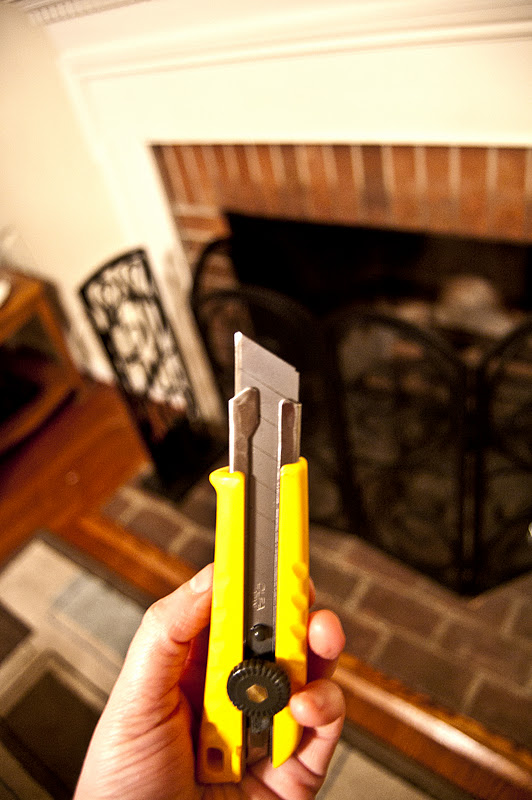
 It was actually just the opposite. No hair dryer needed. All that I needed was a sharp edge. I used a box cutter.
 It peeled right off! Leaving gross little white outlines from the soot stains on the walls...
Here is the carnage. Don't worry, we love that verse and will be replacing it with a fresh new one. In order to paint, this one had to go.
Here we are, no more vinyl, no peeled paint. Easily removed!
Take a good look at this photo, because our mantle wall looks nothing like this anymore! It is a totally different room and I LOVE it!