Friday, September 30, 2011

Fabulous Friday #5: Easy Artwork!

Welcome to this week's Fabulous Friday!

I have yet another project from my girl room to share this week! The wall that you see to the left when you first enter the room has been naked for a while. And it was really bugging me that it had nothing to give it a little oomph! So I decided to finally do something about it! I happened to have a spare canvas that was the perfect size just sitting around. I have been storing it with intentions of creating artwork for this wall, I just haven't been motivated to do so.
Now to show you how crazy easy it was to create artwork out of it! I simply took skinny artists tape (this is not masking tape or painter's tape, it is specifically to block of parts of canvas. Masking tape would probably work just as well) and made my pattern. I was originally going to do a very asymmetrical crossing pattern. Then, I decided that I would really like a sunburst pattern. So I layed the tape out accordingly. It looked like this:
I considered spraying it with clear gloss, because I kind of liked the white matte against the white gloss. But then I decided that I wanted something more dynamic than that. So I pulled out an old can of black spray paint that I had sitting around and sprayed several coats onto the canvas, making sure to get the edges as well.
Once it was dry enough to handle very carefully, I brought it inside and peeled all of the tape off, revealing this amazing work! The paint bled under the edges of the tape a bit, but I actually kind of like the look! I left it there to finish drying for a few hours.
Here is the naked wall (and myself trying to center the artwork on the wall) It just felt too bare for my taste. I also plan to rearrange a bit on top of the file cabinet. I just kind of threw things on there to make it look finished for now. I still need to finish the cabinet too!
And here she is, hung on the wall! I originally had it the other way, but it looked like the sun rising. While that would be neat, it was not the affect that I was going for!

I really did love the way that it looked. But I just felt like it needed something more. I considered little rosettes to match the lampshade and the decided against it. I had resigned myself to leave it for a while and think on it. Then, I was cleaning stuff out from under my desk and stumbled across the big black silk rose from my hat for my sister's shower.
I stuck it up there with tape to think on it and then decided that I love it! So I went back and hot glued it, to make it official!
Here is the view when you walk into the room now. SO much better! The bare wall is not driving me crazy anymore!
Now...let's see what you guys have done this week!


Thursday, September 29, 2011

Fall Front Door!

Once again, you all know how much I love Fall! Yesterday I decided to FINALLY haul out the front door decor and get the outside of the house ready for fall! (And I wanted to link our door up to the Fall Door Linky party at Southern Hospitality!) So here it is in all it's glory!

First, I had to come to terms with taking down the lovely summer arrangement. I LOVE this thing. But once I pulled it down and got the fall up, I forgot all about it! (Until Spring :) )
 I had it hanging with a command hook because a wreath hanger looked wonky with a wall pocket, and the wreath hanger always hits right on the knocker! (LOL)
 When I took it off it looked like this. (I know, I could have taken the command part down, but why waste a command hook?)
 So I tried hanging my lovely wreath on the hanger but I didn't love the fact that you could see the command strip. I made this wreath last year. It was very simple. I bought a straw wreath form, wrapped a swag of leaves around it and stuck a pumpkin pick in it! Voila! 5 minute wreath and it looks fabulous on our door!
 Then, I got inspired to see if the wreath could be held up by the command hook. I was worried it would look weird and too low, but I decided to try it anyway. I actually ended up liking the look! It doesn't make using the door knocker weird either!


 Then I pulled out this little guy. Got him for $2 at Michael's last year! And the little fake multicolored mum plant adds just the right amount of color and texture.
Here is what the front of the house looks like right now. I LOVE the simple Fall look. Nothing too over the top. Just the way I like it! :)

 Oh he is so cute! I tried him on the other side of the door, but the columns block him and you can't see him at all unless you are walking up to the front door.

Overall, I am so happy with the way that it came out! Everything that I used, we already had. I have been wanting a bale of hay but who knows if I will ever actually get one! Obvioulsy as Halloween gets closer, we will buy pumpkins. (And actually totally redecorate for a week or so, I'm not a gid...Halloween for a month...person). For now, its Fall and that makes me happy!

Wednesday, September 28, 2011

Organization Increases Life Expectancy

Okay, I don't have any facts to back up my title. But I am sure that if I researched it, I would be right! Our house has a habit of things getting out of hand very quickly. Especially in rooms that we don't use as often. It starts out as "Oh, we have people coming over. I will just put this stack of papers in the office or girl room and I'll sort through them later." Well I have a tendency to do that too much, and then never get around to them "later." Here is just a small snippet of what my beautiful, girly craft room had become. Just keepin it real, my friends.
 Piles of crap everywhere. Half finished projects and supplies under the desk, in their bags still many of them. Packing boxes for any orders needing to ship. Bills, mail, wrapping paper. And this was after I had been at it for a few minutes! Not to mention I have been neglecting this poor room as far as finishing up its decor. two of the walls were still naked and screaming for some interest (I have projects to show you about those too!) So last week I decided enough was enough. We had people coming over and I wanted to be able to enjoy the room and not close the door in fear. Not to mention, with my business picking up, I wanted to be able to use the room for what it was intended for. My office.

The first thing that I did was drag all of the random piles of paperwork and bills floating around our house, as well as our too-small bill filing system (that little brown bin) and sorted through all of them. I created name tabs for everything I could think of and sorted it all into our newly remodeled (but not finished) file cabinet. (By the way, I have decided that I love the green!) It felt so good to have our paper monster tamed. And I only used the first drawer for our personal items, so I have the other three for business related paperwork and craft supply storage!
 After working really hard for almost a full day on this room and sorting through a lot of crap..Here is my desk!
 *sigh* I love the look of a clean, organized room. I feel like my stress levels are so much lower! And there is my cutie little chalkboarded pot again! I love it!
 Now I have room for my laptop and can sit in here and work instead of hogging the hubby's office upstairs! Now just to sneak my big, dual-screen monitor down!
 You see that little curtain? Yeah I have an awesome process to show you guys! Easiest curtain installation ever! I love this room now. I loved it before, but there is something about it being neat and clean and girly that just makes it that much more fun!


Pin It

Tuesday, September 27, 2011

True Life: I have a Chalkboard Addiction

I know that there are probably SO many people out there that struggle with this just like I do. In fact, I know my friend Amanda Carver (Amanda Carver Designs) does! She recently chalkboarded a refrigerator!  If you leave something that I think is ugly in color...or maybe just boring...around me long enough, it most likely will get covered with chalkboard paint. Its just a fact that I have come to accept.

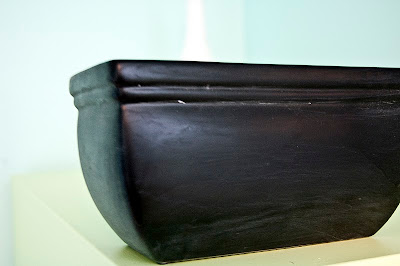
A friend at work gave me this brown, glazed clay flower pot a while back because she did not have a use for it. While I did not hate it brown, I thought it was boring. I also wanted to use it in my girl room, which is primarily blacks and teals and greens and the brown just looked all wrong in there.
So the other night I took it out back and shot it. With a can of chalkboard paint! You felt bad for a minute...I know! I did not do my fanciest spraypainting, because it was dark out and I kept hearing noises. I got a few drips, but you cant really even tell. Big deal, right?! I kind of liked the way it looked just painted with the chalkboard paint.
 Once you let the paint dry for 24 hours (this step is really important!), You rub chalk all over the newly chalkboarded surface, to prepare it for writing. It should look something like this, which I also don't hate!
 After doing that, you have to take a cloth, paper towel, something and wipe the chalk off. You don't want to get it all off, just kinda smear it around some.
 Once you have done this...it is ready to be written on! I have found that you should not press too hard the first few times that you write on a chalkboarded surface. It still tends to be a little soft and can scratch.
 I took the flower pot and filled it with ribbons, my glue gun, glue sticks and a few other craft items that are usually strewn about my desk.
 Once I had filled it as full as I could without over-filling it, I tucked it onto the open bottom shelf of the little cabinet that sits on my desk. It is the perfect size for the opening!
This was part of my campaign to organize and clean the girl room. I have a whole separate post about that! And several other little projects to share! :) The long-neglected and poorly organized craft room now looks amazing and neatly organized!

Monday, September 26, 2011

What to do with leftover cake: Cake Pops!

So, I don't know if you have heard of this fabulous new trend called cake pops, but they are amazing! I have seen them made several different ways. One is to bake a little wad of cake and dip it in either softened icing or melted chocolate. The other way is to take cake, crumble it up, smush icing in with it, and roll it into balls (much like a meatball) and then dip that into melted chocolate. I prefer this taste, because I like the icing in there and it is usually more moist.

As much as I like cake pops, I had never attempted to make them before. You would think, since I love to make cakes, that I would have tried my hand at this. But there is a first time for everything! We had our community group coming over for the first time on Thursday night, so I figured it was the perfect time to try it out! We had leftover birthday cake from Michael's birthday and a half a can of icing. I also happened to have some brown and yellow candy melts from Ashley and Mac's groom's cake!

I took the cake leftovers and crumbled them up in a bowl. I did not worry about scraping off the old icing, because I was just going to add more! And then I added a half a can of milk chocolate icing! (next time I will probably use a little less icing, as they were a tad bit mushier than I had originally planned once they came to room temp).
 After making my hands look very nasty mixing this all together, I formed the cake into balls (again using the same process that you would with meatballs, if you have ever made them.) I did stop and refrigerate them periodically so that they weren't too mushy. Once I had made all of my balls, I went back through and stuck a stick into each one and then popped them into the freezer to harden for dipping!
 All this, I did while making a yummy fettuccine alfredo and chicken for dinner. I did not burn it, either! (okay, the smaller chicken breast was a little...done. but not burnt!)
 The next part of the process was very messy, so I did not take any pictures. Didn't want chocolate hardened onto my camera! All that you do is melt the candy melts (you can get these at Michael's or AC Moore for a couple dollars) and then dip the pops into it. Mine were a little sloppy for some, but I give myself a break because it was my first time! It was so ridiculously easy, though. I only had one incident where the cake fell off of the stick. This is why its important to freeze them if they are mushy!
Here is the finished product! They tasted delish! Michael had never heard of them before, so it was kind of fun. They seemed to be pretty popular too. I will definitely be making them again!

Sunday, September 25, 2011

Fall Candle

Happy Sunday, friends! This very well may be the simplest project that I have ever put on here. But its totally worth sharing, just to prove how really simple and inexpensive projects can dress up a room! I love candles. We always have them around. Especially Fall candles. Anything pumpkin spice, apple cinnamon, Caramel....okay any fall food smelling candle. The Autumn leaves ones are okay. But I love the ones that smell like good old fashioned Fall comfort food. (We have an apple cider one that I am obsessed with! We burned through it in a couple of weeks. Time for a new one!)

Anyway, back to the project. So at the dollar tree the other day, I picked up this cute-but-simple glass candle holder. I really like the shape of it and for one buck you can't beat that!
And then I stumbled across this candle. Now some pumpkin candles are not-so-great. This one is fabulous! It has just enough cinnamon to make me love it. And the color works really well with our kitchen.
 Here's the hard part! I unwrapped it and plopped it into the candle holder. Brilliant, I know! :)
 And then I decided that was too easy. So I ran down to the craft room and rustled up a piece of twine that I had leftover from another project.
And I tied it around the vase and tied a bow. Its amazing how a little piece of twine can really change the look of something. It totally brings it into Fall and is so much cuter than just a plain orange candle plopped into a glass jar!
You don't have to spend a ton of money to decorate for the seasons. Seriously! Try Goodwill and the dollar store. Or yard sales! People are always trying to get rid of stuff and don't seem to care as much about the profit. There is nothing a little spraypaint can't fix! So far, my entire Fall redecorating has cost a totally of...maybe $10 max!

Saturday, September 24, 2011

Fall Wine Glasses

Good Saturday morning, friends! I am working today, so it's kind of a bummer. I hope you all enjoy your Saturdays for me! I have a really cute/easy project that I have been wanting to do for a while to share with you guys! We have lovely shelves that go up the sides of our kitchen window, which we use to display our wine glasses. I like the look because it is very simple, but is still elegant looking. Not overwhelming or cluttered looking at all (it is easy to make these types of shelves look cluttered).
 But in light of the fall decor slowly taking over our house, I decided that this:
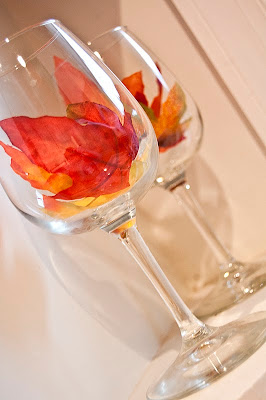
 Was kind of boring. So while at the Dollar Tree the other day, I saw this lovely pick of leaves...for $1! I had to buy them! You can't beat a dollar! And I knew JUST what I wanted to do with them as soon as I saw them. They had options as far as the color and I almost went for a slightly duller bunch, but then I decided that the extreme pop of color would be nice!
I came home and plucked them all off of their branches. And then set myself about distributing them evenly in the wine glasses, thus creating this look:
 For Dollar Tree leaves, they look very natural! I was really happy with the look.
 I did go back and tie twine around the stems of a few of them, but I forgot to take a picture! If I remember, I will share that on here too!
 So here is the window, complete with fall foliage. Just the right amount of color but still relatively unassuming.
I really have to admit, I LOVE LOVE LOVE Fall. It never comes to mind as my favorite season when people ask, but its to cozy and wonderful! It makes me happy to be in my house. I love our house. Have you started pulling out your Fall Decor? I would LOVE to see it linked up to Fabulous Friday's linky party!